Although Apple HomeKit offers both voice control and powerful automation, the system is rather limited in terms of hardware support. For example, you will not find any Nest support for the platform, nor any Sonos compatibility. It's there that's between Homebridge.
Able to run on virtually any computer, Homebridge is, as its name suggests, a bridge between HomeKit and other devices. NodeJS lightweight server emulating the HomeKit iOS API, Homebridge is open source software that provides missing support on the platform. It is in no way affiliated with Apple and, as with all open source software, install it at your own risk.
Read it: The best HomeKit features coming in iOS 13
Installation and execution can be tricky, but we will guide you through the initial installation. We will show you how to configure the system, how to add devices and how to get started.
On which computer should I run Homebridge?
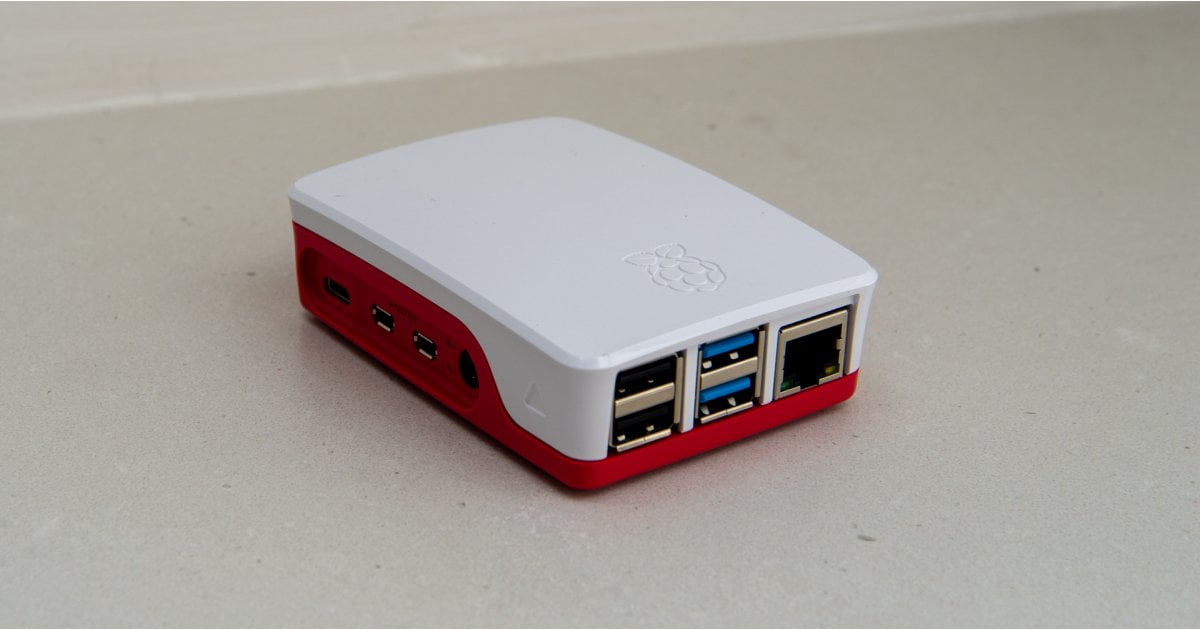
Homebridge works with Windows, macOS, Linux and Raspberry Pi. The most important thing is that no matter which device you install it on, it must be turned on all the time to work. For this reason, it is wise to install it on a Raspberry Pi because the small computer needs little energy to operate.
It is helpful to read the Raspberry Pi installation instructions on the Homebridge wiki to install the initial required components before returning to the Homebridge GitHub page for Homebridge's installation instructions.
If you do not have a Raspberry Pi and just want to try the system on a different computer type, start by downloading and installing the latest version of Node.js, available for Windows, Mac, and Linux. .
Once installed, follow the steps on the Homebridge GitHub page to download and install Homebridge. You must use the following command line from a terminal window during installation:
npm install -g --unsafe-perm homebridge
sudo npm install -g --unsafe-perm homebridge
Once finished, you are ready and Homebridge is installed on your computer. You can run it using the command prompt and typing "homebridge".
You will see a QR code on the screen, as well as a message telling you that there is no config.json file and that you have no plug-in. in. For now, quit Homebridge by accessing the Terminal window and press CTRL + C (Apple + C on a Mac).
Install plugins and configure Homebridge
Then you have to edit (or create) the configuration file. For Linux and Raspberry Pi devices, you can get a command line and type nano ~ / .homebridge / config.json. For Mac and Windows computers, we recommend installing Brackets.
With square brackets, you can create a new file from the File, new m e n u. Go to to save, then you must give the file the correct name and place it in the correct directory. On Windows, you must enter the following directory name in the registration dialog box: c: users
For Mac users, in the Save dialog box, press Command + Shift + G, and then type: ~ / .homebridge. For both, enter the file name as config.json. With the brackets, your config.json file is always available when you open the application. Therefore, for future updates, you can select the file, enter the text you need and click Save.
You can now start adding the information you need. First, you need a basic configuration, such as this one:
{
"bridge": {
"name": "Homebridge",
"username": "CC:22:3D:E3:CE:30",
"port": 51826,
"pin": "031-45-154"
},
"description": "My Homebridge server.",
"ports": {
"start": 52100,
"end": 52150,
"comment": "This section is used to control the range of ports that separate accessory (like camera or television) should be bind to."
},
}
You can change the user name and PIN, but you must keep the same shape and length.
Adding Homebridge plugins
To work, Homebridge requires plugins. Each plugin is designed to connect to a specific product, such as a Nest Thermostat. In addition to installing a plugin, you must also edit the configuration file (config.json). It is worth adding a single device first and then proceeding with each new device one at a time.
You can find plugins on the Homebridge website, using the search box on the home page. For example, we searched for "Nest". In the search results, find the one that best matches the device you want to use. In our case, to run a Nest Thermostat, we chose the homebridget-nest plugin, which supports both Nest Thermostats and the Nest Protect smoke alarm.

When you select a plug-in, you will see the installation instructions, with the necessary command to install it. Ignore the Homebridge installation instructions (you have already done so) and instead choose the plug-in instructions.
In general, the command looks something like npm install -g homebridge-
sudo npm install -g homebridge-nest
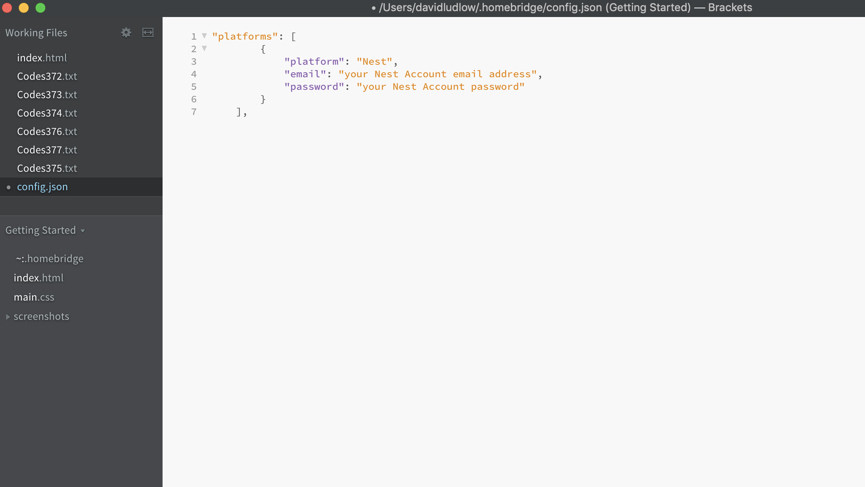
Each plugin page has an example of what to enter. For example, for Nest, you need:
"platforms": (
{
"platform": "Nest",
"email": "your Nest Account email address",
"password": "your Nest Account password"
}
),

Save your configuration file, then start Homebridge. If two-factor authentication is enabled, you will be prompted to enter a PIN, which will be sent to you via SMS. You will need to do this each time you start Homebridge for two-factor authentication. You will then see a QR code and a PIN code on the screen of your computer, indicating that Homebridge is working.

Add Homebridge to your phone
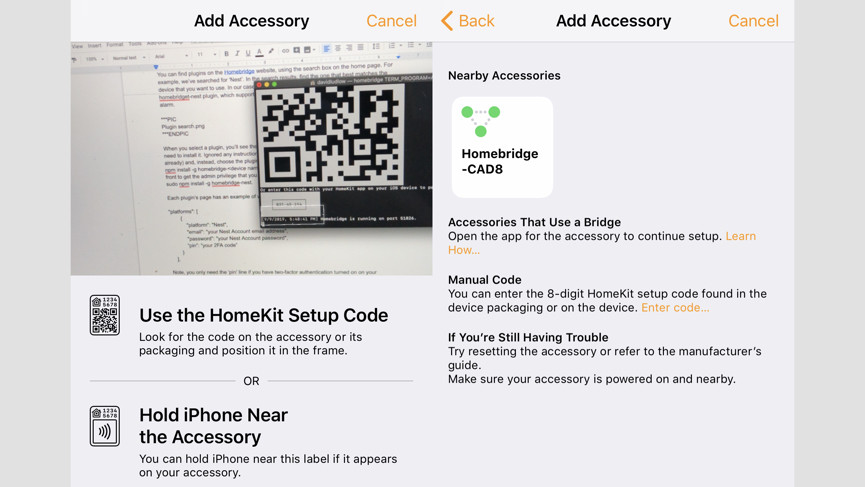
With your setup working, open the Home app on your iOS device. Then select "+" and select Add an accessory. Tap Do not have a code or can not scan, and then select your Homebridge computer on the next page.
You will be told that it is an uncertified accessory, but select Add anyway. Manually enter the HomeKit configuration code (the main PIN code in your configuration file). Now your Homebridge devices will be found and added to Home, but do not be surprised if there is more than you think.
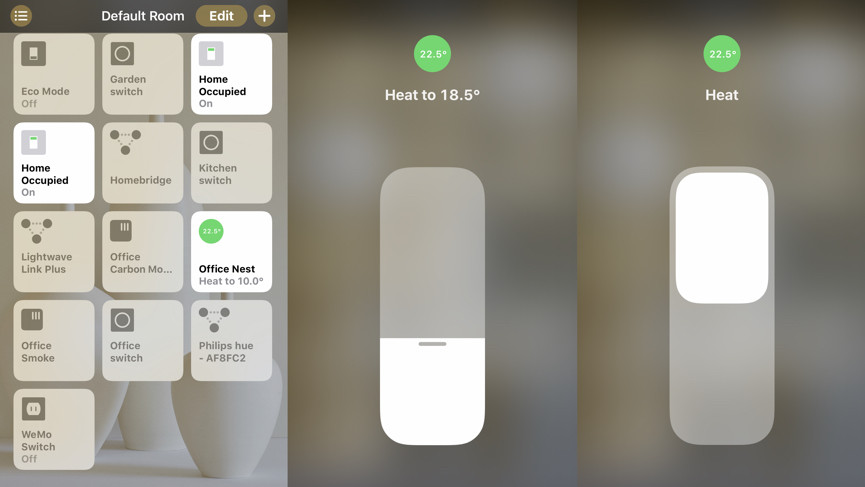
For example, with Nest Thermostats, you get a switch that turns on or off the Eco mode, the main thermostat control, and a switch that determines whether you're at home or not. All devices you add will appear while running your Homebridge server.
Adding additional devices
When Homebridge works, you can add additional devices. As we said, it's worth taking one at a time, so you can check that everyone is working.
To add a new device, exit your Homebridge server, then download and install the plug-in by following the tips above. Now, when you edit your configuration file, you have to do something different because you can only have one section "platforms", with the details between the square brackets.
Each platform you add must be in braces, with a comma between each section. For example, to have Nest and Wemo, here's what the configuration might look like:
"platforms": (
{
"platform": "Nest",
"email": "your Nest Account email address",
"password": "your Nest Account password"
},
{
"platform": "BelkinWeMo",
"name": "WeMo Platform"
}
),
You can continue adding plug-ins and devices to your Homebridge server, which greatly increases HomeKit's capabilities. Everything added to your server is also fully controllable by Siri, whether on your Watch, iPhone or HomePod, and you can include devices in Automations.


