Ever since I started building my HomeKit, one of the areas I haven't touched is my garage doors. I've researched various adapters over the years, but I have an off-brand garage door opener that never seemed to be on the compatibility list. I recently met a model who made works with my special opener, so I was pleased to be able to pick it up and install it. I have had the iSmartGate Pro garage door opener installed in recent weeks and I couldn't be happier with it. If you are looking for a HomeKit garage door opener, continue to see how it works and how to use it.
HomeKit weekly is a series focused on smart home accessories, tips and tricks for automation and everything to do with Apple's smart home frame.
I've been living in my house for six years, so I've added HomeKit items over time, as prices have dropped and products have been launched. I wanted to control my garage doors from HomeKit for a while, but I was never willing to replace my opener with a compatible one. All of the HomeKit garage door opener models I found needed to change my opener or are not compatible at all.
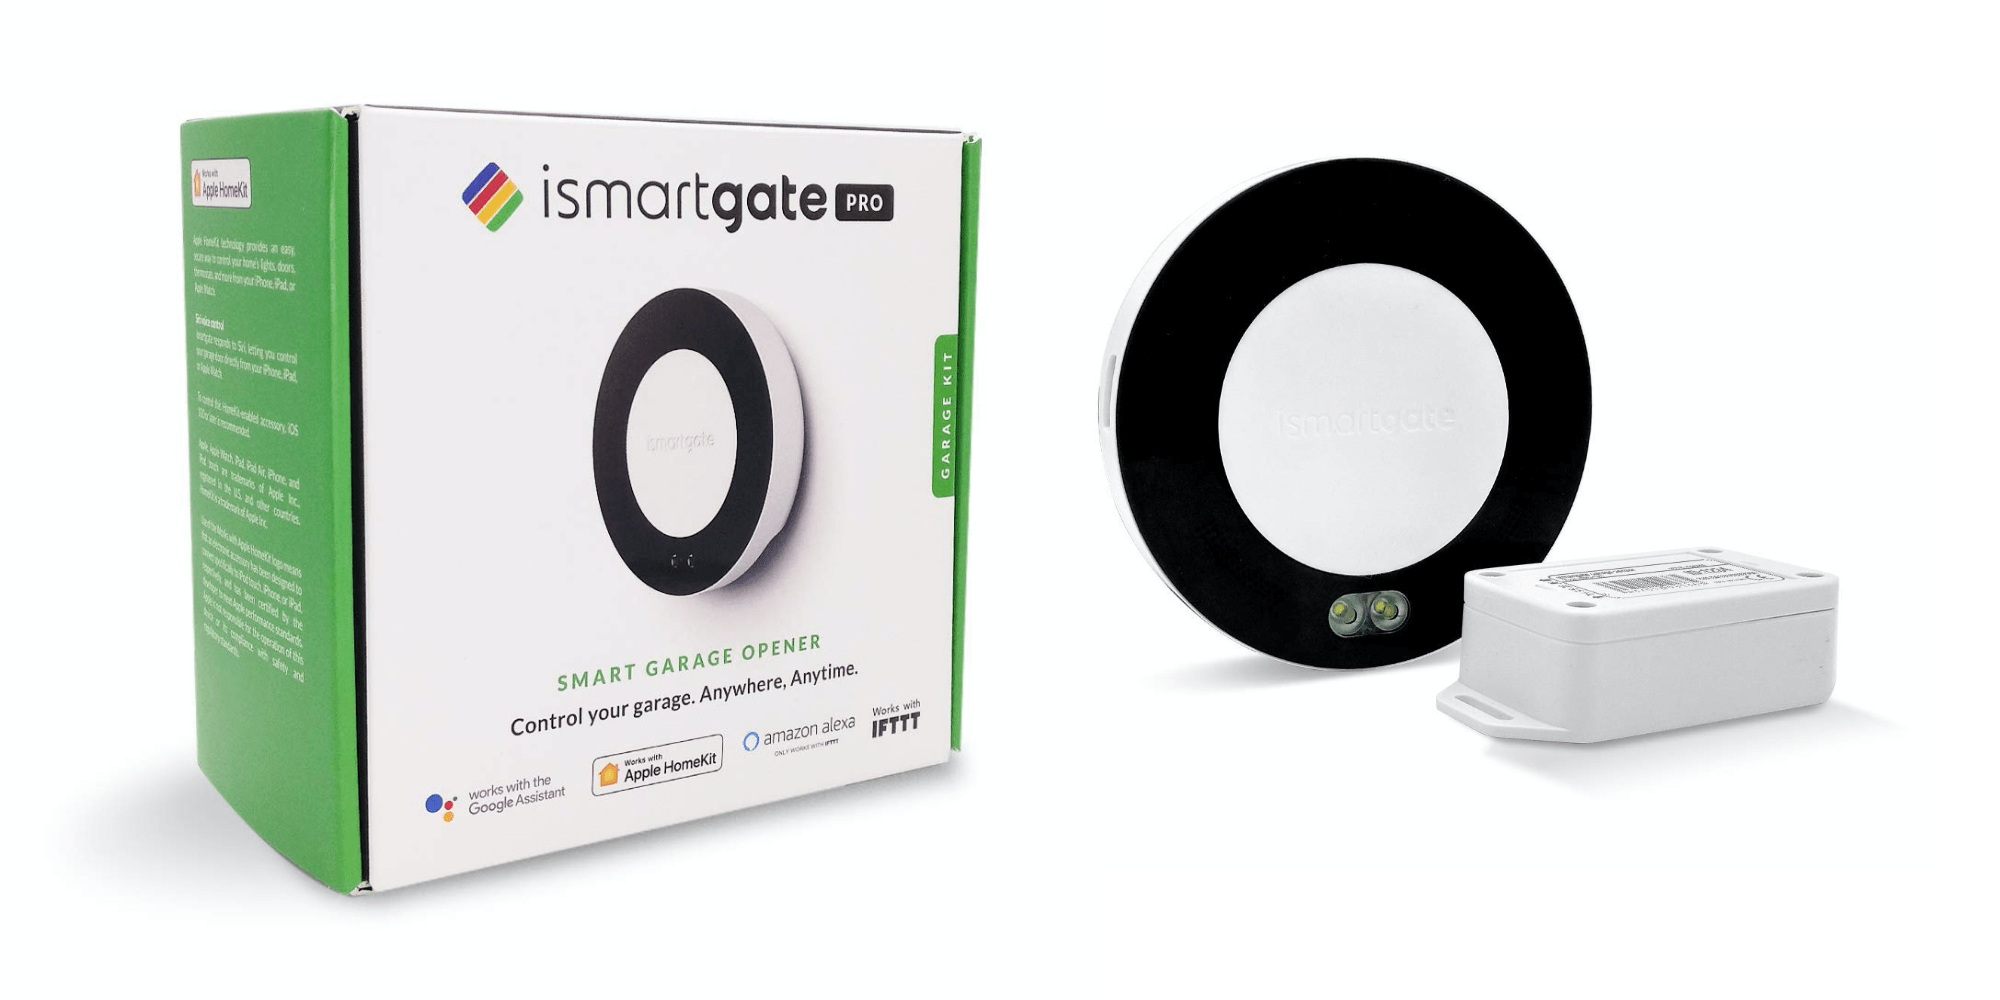
iSmartGate has an extended compatibility checker. You are looking for your brand and then the model and this will give you the exact wiring diagram on how to configure it. Once I discovered that my units (we have two separate doors) are compatible, I started to look at what model I needed. I went with the Pro option with a second sensor. There are two: Pro and Lite. The Lite model works with HomeKit, but is not compatible with more than one door cable sensor. It also does not include an LED light or custom opening and closing music. Because I have two doors, I went with the pro model.
The installation process

The first step to installing an iGate garage door opener is to find out how it will connect to the opener. With products like this, installation instructions are a huge part of the initial satisfaction with the product and iSmartGate delivered with their step.
As I have mentioned many times, they are not very handy, so any connection with the actual repair / modernization of the home is not something I always make comfortable. I would advise you to connect everything to your network before actually removing the ladder that connects it to the garage door opener. I did everything on the iSmartGate app. This part is pretty standard with the smartest household products. Go through a pairing process to connect it to your Wi-Fi network (it also supports USB over ethernet if you want to go that route).
During the process, you have the opportunity to connect it to HomeKit. Again, this part is very perfect. I was sent to the Home application where I could scan the QR code behind the unit. In fact, you don't need to create an account at the manufacturer if you use HomeKit. I chose to do this for testing purposes only, but I always appreciate when this is an option, as this is one of the reasons why I like HomeKit (privacy options).
One of the downsides to using HomeKit is that their application is only required for future firmware updates. I would like to see Apple allow firmware updates from the Home app in future versions of iOS.

One thing you need to configure is connecting the wireless sensor to the main unit. There is a code that you will use to program it. This sensor lets you know when the door is up or down.
Once it's set up and connected to your network, you'll be ready to do the fun part: connecting it to the opener. The instructions are great here too. To complete this part, you will need a small screw with flat screw. There are two configuration modes: direct connection to the opener or connection to the wall button. I didn't have power near the wall clothes button, so I opted to plug directly into the opener. For the first unit, connect two wires in the slots of door 1. For my unit, I connected them in slots 3 and 4 on the opener itself.

The next step is to install the sensor. We have a sectional door, but they have instructions for almost any type of door you have. Once set up (and if all is well), you can now open and close the door from the Home app or the iSmartgate app.
You will repeat this process if you have a second door. If you didn't configure the second door in the first round, you can easily add it through the iSmartgate app. no more the suggestion I faced throughout the whole process was that the included wire was not enough for the second opener. These are 2 standard wires that can be purchased from any hardware store or from Amazon. After I added that I also have my wife's door configured. I used a staple gun to prevent the wire from collapsing. After I added it to the iSmartgate app, it immediately appeared in the Home app.
How to use a HomeKit garage door opener

As I mentioned before, I'm still on HomeKit. I do not buy another household product that does not accept it. I like the simplicity of being able to do my automations within a single application and to link them together. One of the reasons why I wanted to integrate my garage door into HomeKit is that they are notorious because I thought I forgot to close them (I rarely do). With a HomeKit garage door opener, I can always check it remotely because I have multiple Apple TVs configured as HomeKit hubs.
The automations we have installed are that they automatically close at 21:00 (if they are not already closed) and they automatically close when we move. I have my wife's phone set up for her opener and my truck for mine. The only thing I hate about automation is that it asks me to confirm that I want to run it. The Home app says it's possible to allow entry into my home. I see that alert for opening The door is closed to prevent entry into my house.
Cover on the HomeKit garage door opener
Overall, I like having a HomeKit garage door opener. I like how easy it was to install it in my openers for six years. I like how I can check now my doors are closed. I like how I can open them remotely if a friend or family member should borrow an instrument from my garage.
From start to finish, it took me less than thirty minutes to install it. The hardest part was getting the cables between the two units to the ceiling. If you want an easy way to convert older garage door openers into HomeKit, it's not super handy and you don't want to spend a lot of money, check out the iSmartgate Pro garage door opener. If you have two doors, make sure you choose a second sensor. I couldn't be happier with this product. Since I installed it, I have never had a single one when it failed to work or had to be restarted.
FTC: We use car affiliate links to earn revenue. More.
Check out 9to5Mac on YouTube for more Apple news:
(Embed) https://www.youtube.com/watch?v=BNq8CXms7JU (/ embed)