VPN offers: lifetime license for $ 16, monthly plans for $ 1 and more
 Source: Christopher Close / iMore
The Apple Home app is the command center for all the best HomeKit accessories, putting door locks, light bulbs and more just a few touches away. Before you begin, however, you need to create a home for all your accessories. Fortunately, the Home app makes this process incredibly easy, so you can run it in seconds. Here's how to add a home to the Home app!
By default, the Home app will automatically create a home that you called My house when you first launch the app. With the default home, you can start adding accessories, creating rooms, setting custom wallpapers, and more.
If you want to be creative with your home name, you can change things through Home settings from the Home menu.
VPN offers: lifetime license for $ 16, monthly plans for $ 1 and more
Touch Home settings.

Source: iMore
Touch Done to save the name of your house.

Source: iMore
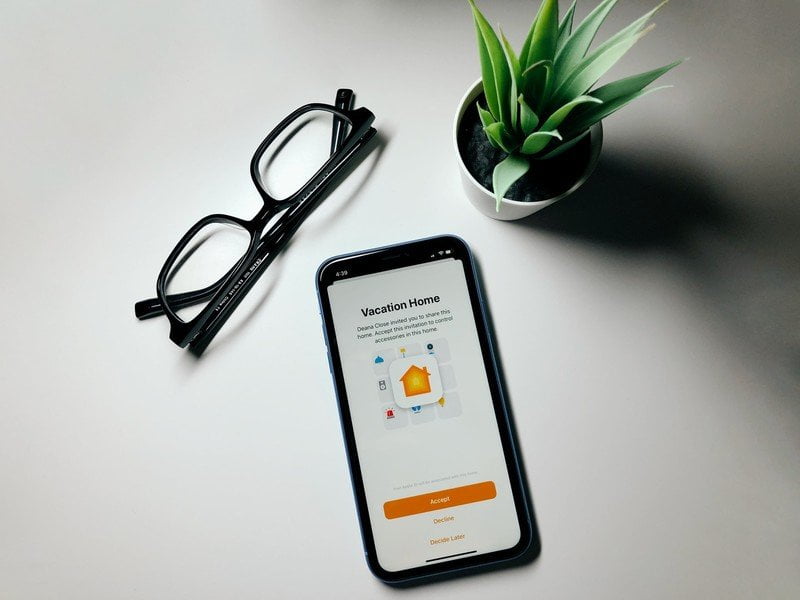
If there are other members of your household whose HomeKit accessories you want to control, here's how:
Touch Home settings.

Source: IMore
Touch Send invitation in the upper right corner.

Source: iMore
If you receive an invitation (or need to help someone with an invitation you sent), here's how to accept an invitation:
Touch Home settings.

Source: iMore
Touch I accept to join the house.

Source: iMore
If you have multiple locations to control with the Home app (or want to customize the look of the app), you can change the Home wallpaper. Here's how:
Touch Home settings.

Source: iMore
Touch Use Photo or Set after adjusting the photo as desired, by zooming and zooming.

Source: iMore
The Home app provides a small handy field for storing notes that can be viewed by anyone who has received an invitation at home. For example, if you have a rental property controlled by HomeKit, you can leave notes for your tenants in this area. How do you add notes to your home? Follow along:
Touch Home settings.

Source: iMore
Touch Done in the upper right corner when you're done.

Source: iMore
Touch Home settings.

Source: iMore
Touch Remove on the confirmation pop-up list. This is the last step before your existing home is demolished. Continue only if you are ready to remove it.

Source: iMore
Keep in mind that when you delete a Home, you also delete the corresponding data synced with iCloud. Your guests will lose access to your HomeKit accessories and customizations.
It covers everything you need to know about adding a Home to the Home app. If you have any questions, let us know in the comments below!
 meross Smart Light Switch, Single Pole WiFi Wall Switch, Needs Neutral Wire, Compatible with Alexa, Google Assistant and SmartThings, Remote Control, Schedules, No Hub Needed, 2 Pack
$22.99
HomeKit.Blog is in no way affiliated with or endorsed by Apple Inc. or Apple related subsidiaries.
All images, videos and logos are the copyright of the respective rights holders, and this website does not claim ownership or copyright of the aforementioned.
All information about products mentioned on this site has been collected in good faith. However, the information relating to them, may not be 100% accurate, as we only rely on the information we are able to gather from the companies themselves or the resellers who stock these products, and therefore cannot be held responsible for any inaccuracies arising from the aforementioned sources, or any subsequent changes that are made that we have not been made aware of.
HomeKit.Blog Is A Participant In The Amazon Services LLC Associates Program, An Affiliate Advertising Program Designed To Provide A Means For Sites To Earn Advertising Fees By Advertising And Linking To Amazon Store (Amazon.com, Or Endless.com, MYHABIT.com, SmallParts.com, Or AmazonWireless.com).
The opinions expressed on this website by our contributors do not necessarily represent the views of the website owners.