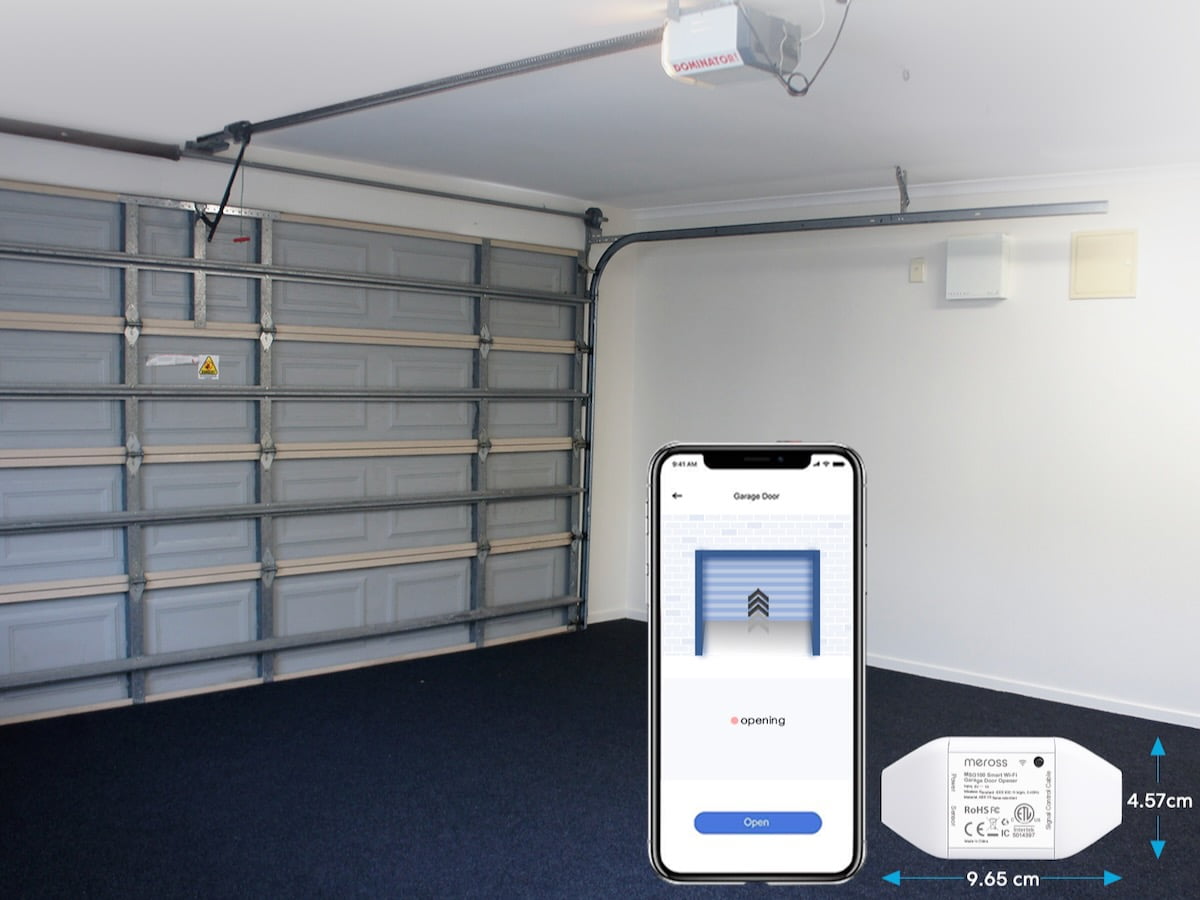
The Meross is a simple device that you add to your existing garage door opener to enable automations. I have a lot of HomeKit automation in my house. So when our HomeKit garage door opener stopped working, it was the one automation my wife wanted me to replace right away. What is the Meross Smart Wi-Fi garage door opener? The Meross garage door opener is a device that works alongside your pre-existing garage door opener...essentially adding a remote opening capability (similar to the remotes you use to open your garage from your car, but instead of a physical remote you can use automation with your existing smart devices). The Meross works with Apple's HomeKit, Amazon's Alexa and with Google Home. As I mentioned in the intro, we use HomeKit in our home, so I'll cover it mainly from a HomeKit perspective, but the overall functionality is similar across all platforms. Below are the specifications for the Meross:
The Meross garage door opener comes with the following:
The installation of the Meross garage door opener is pretty simple. The instruction booklet that comes with the device will tell you to do the following to get started:
At this point the Meross app the device is electronically configured and the physical part of the installation can begin. The Meross comes with a wired door sensor, so you will need to run the wire from the garage door opener that is already hanging from the ceiling in your garage across the ceiling to the top of your garage door. The sensor consists of two halves, one connected to the wire you just stretched and the other is a standalone piece. Once the two halves are close enough together, the sensor (using magnets) indicates that the door is closed and when the door is opened and the sensors move apart, it indicates that there is an open garage door. So one of the sensors must be attached to the door and the other sensor to something other than the door (there are several configurations you can choose for this setup, so check the app for the different variants). I attached the end of my wired sensor to the wall directly above my garage door and the other sensor half to the top edge of the garage door itself. You have several options to attach the sensor: use the supplied screws or the supplied double-sided tape. I would recommend the screws if you are attaching to wood and use the tape if you are attaching to metal. I used the included double-sided tape for the sensor that attaches to the door and wood screws for the sensor that attaches to the garage wall  . The final part of the installation is to connect the Meross device to the terminals on the back of your garage door opener, connect the wired sensor to the Meross device, and connect the Meross device to power. The connection to your existing garage door opener depends on which brand and model you have. Essentially, you plug it into the same locations used for the wired control unit you have in your garage (the one you use to open and close your garage door as you enter and leave the house). Your specific instructions for your garage door opener will be a good reference point for this step. In my case, my garage opener was so old that no instructions were available, so I had to rely on looking at the existing wiring to figure out which terminals to connect the Meross to. Once that's done, all you have to do is decide how you want to secure the Meross device. The Meross comes with a zipper and double-sided tape, so use whichever method works best for your setup. The Meross unit simply sits on top of my existing and rather dusty garage door opener. There's a lot you can do with automation once you connect the Meross to your existing garage door opener. One automation I use is a scheduling automation. Every evening at 11 p.m. I let HomeKit close my garage door. That way, if we forget to close the door at night, it will at least be closed at 11pm every night. Having personally woken up many times to realize we had left our garage door open all night, you can see why this is my wife's favorite automation. Another way I use HomeKit automation is with CarPlay. The main screen of my CarPlay display in my car automatically shows a control button for my garage door. So when I pull into my driveway and can simply press the button on my CarPlay touchscreen and my garage door opens (this is a great backup for when the physical remote on my old garage door opener doesn't work). The third way I use this automation is when I leave the house to go for a bike ride. I have an iOS cycling automation that I use that starts the workout on my Apple Watch, starts playing my workout playlist, texts my family that I'm going to ride, and closes the garage door behind me. When I get home, I just raise my wrist and ask Siri on my Apple Watch to open the garage door. This is now my third HomeKit compatible garage door opener. The first one died during our move out of state and the one Meross replaced stopped working because it wasn't compatible with HomeKit and the device I used to connect it to HomeKit stopped working. I have now purchased two Meross units, one for my old garage door opener and one for a new garage door opener for my second garage door. Of all the three types of devices I've purchased so far, I have to say that I like this one the best (I'm not mentioning the names of the other two because they're no longer sold). The Meross has a wired garage door sensor which makes installation a little more complicated, but makes the system much more reliable in the long run. So if you're looking for a way to automate your existing garage door opener, I definitely recommend checking out Meross. The Meross Smart Wi-Fi Garage Door Opener can be purchased directly from the Meross website or through Amazon.com for approximately $50. This article contains affiliate links Like it? Please take a moment to support GeekDad and GeekMom on Patreon! Related
 eufy Security S100 Wired Wall Light Cam,Security Camera Outdoor,2K Camera with 1200-Lumen Light,Color Night Vision,Motion Activated Light, AI Detection,IP65 Waterproof,Floodlight Camera(Renewed)
$116.99
 Aqara Smart Hub E1 Plus Aqara Door and Window Sensor, Zigbee Connection, Remote Monitor and Control, Smart Home Automation
Original price was: $47.98.$41.99Current price is: $41.99.
HomeKit.Blog is in no way affiliated with or endorsed by Apple Inc. or Apple related subsidiaries.
All images, videos and logos are the copyright of the respective rights holders, and this website does not claim ownership or copyright of the aforementioned.
All information about products mentioned on this site has been collected in good faith. However, the information relating to them, may not be 100% accurate, as we only rely on the information we are able to gather from the companies themselves or the resellers who stock these products, and therefore cannot be held responsible for any inaccuracies arising from the aforementioned sources, or any subsequent changes that are made that we have not been made aware of.
HomeKit.Blog Is A Participant In The Amazon Services LLC Associates Program, An Affiliate Advertising Program Designed To Provide A Means For Sites To Earn Advertising Fees By Advertising And Linking To Amazon Store (Amazon.com, Or Endless.com, MYHABIT.com, SmallParts.com, Or AmazonWireless.com).
The opinions expressed on this website by our contributors do not necessarily represent the views of the website owners.